

During my researches I found out that the thickness necessary for rear disc brake of Transit V347 is 15mm thick. I found out that non-vented disc rotor for my vehicle is 15 mm thick so it was a very easy find for me. You can use any 15 mm, 8 bolt disc from any manufacturer but if the total diameter is different than you need to re-design the brackets.


Then after careful measuring I designed the brackets. Due to the geometry of the calipers I was necessary to mount the brackets from pumpkin side of the axle so 3 bolt mounting was mandatory instead of 4.
Below is the picture of my bracket and shims that are laser cut. Shims are 12 mm each and main bracket is 10 mm in thickness. I made a mistake and did not cut the bracket and shims open. If I do it again I will receive them cut (through the white lines) from laser. It was not easy and clean to cut by wheel.

New bracket design for laser cut (includes lines for laser machine to cut open)

Remember that for my disc rotor the shim needs to be in 24 mm thickness. I cut two 12 mm shims. For different disc rotors you may need different thicknesses.
I do have dxf file for this bracket for laser cutting, I can share if requested.
Bracket is ready, Disc Rotor ready, caliper ready: ACTION:
I purchased stands and rest the axles on them:

Loosen the nuts to take out the drums:

Unbolt, take out every drum mechanism:

You are left with 4 bolts that hold the drum plate, unscrew them: (don't forget to loosen brake line behind the plate which is connected to the cylinder which you can see on top)

With a hammer, take out the bolts which holds the hub and drum:
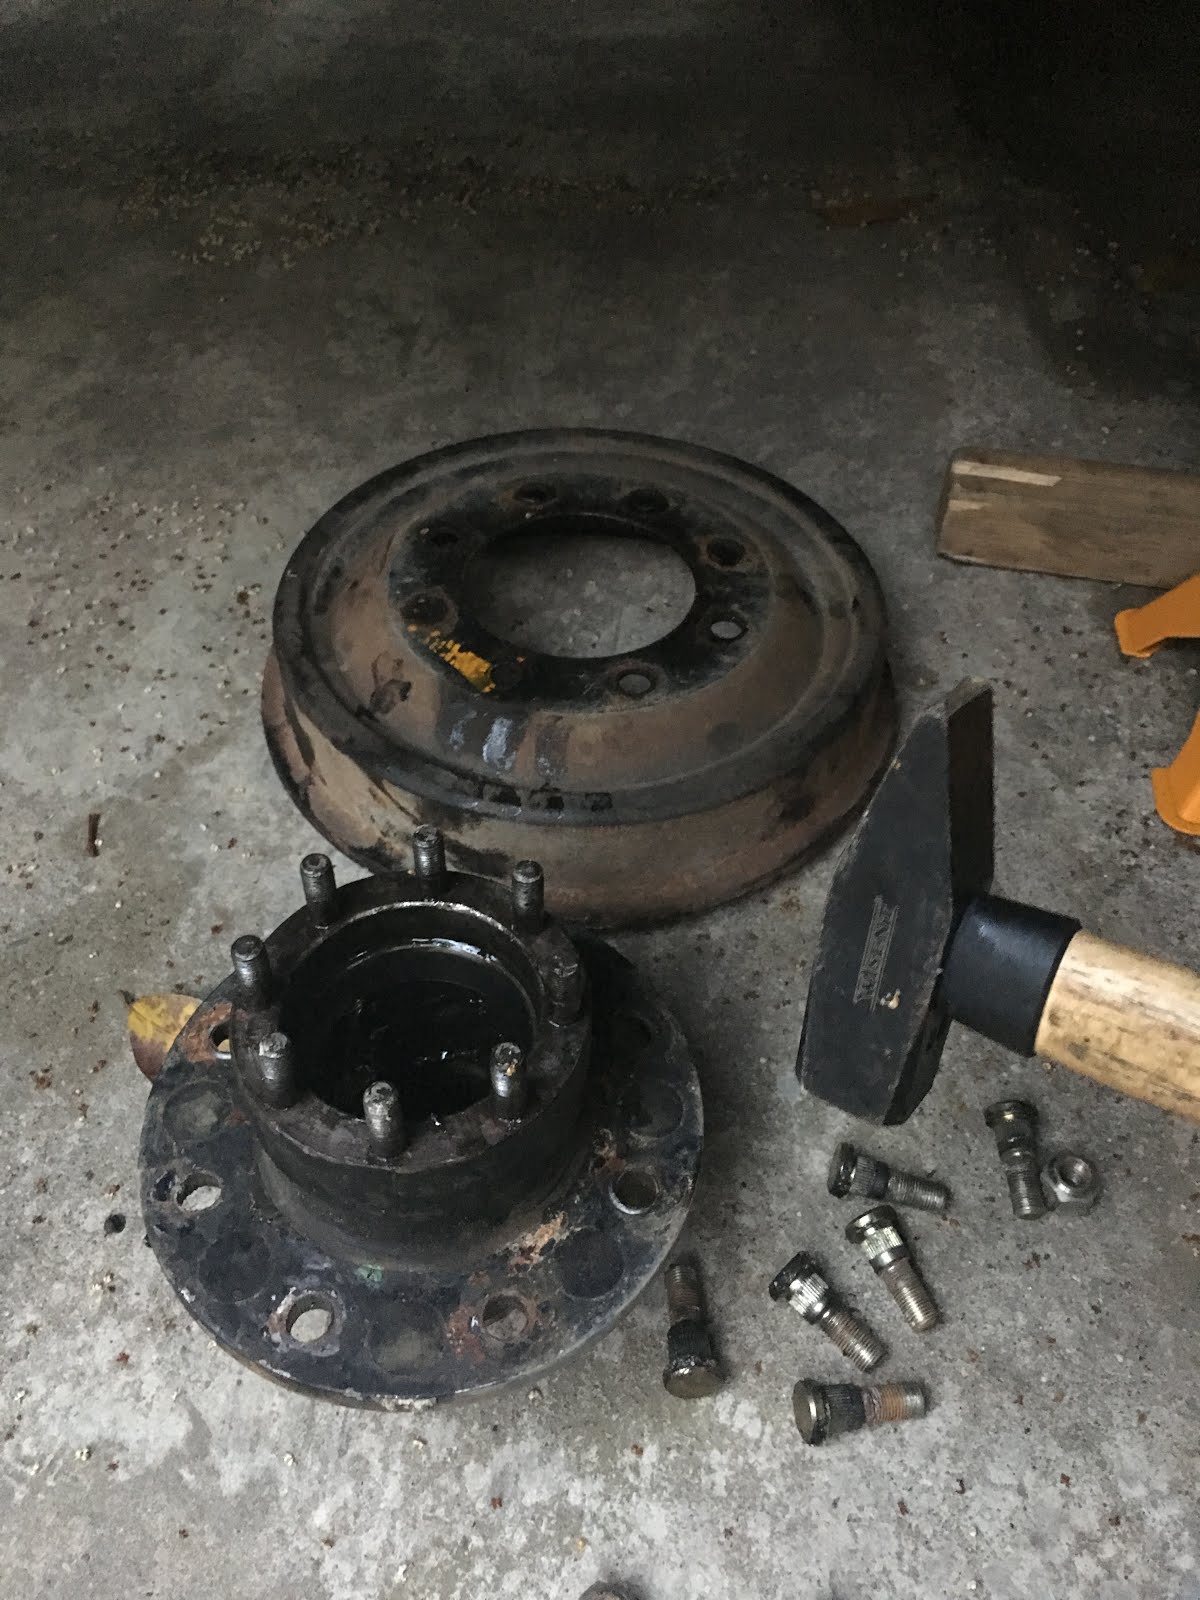
Clean with a wire brush:


You need new and longer studs for this installation, with everything clean and oiled, with the help of a nut, screw the studs to their places.

I measured every stud to check if they are all seated equal.

And first look to my creation (without brackets installed) :

And the brackets come to their new home:
I used 1/2" bolts which fitted tightly to the existing holes without modification.


Note that caliper is tilted clockwise. This is to achieve correct handbrake cable connection angle. Of course this is copied from Ford Tranist V347 geometry. :)
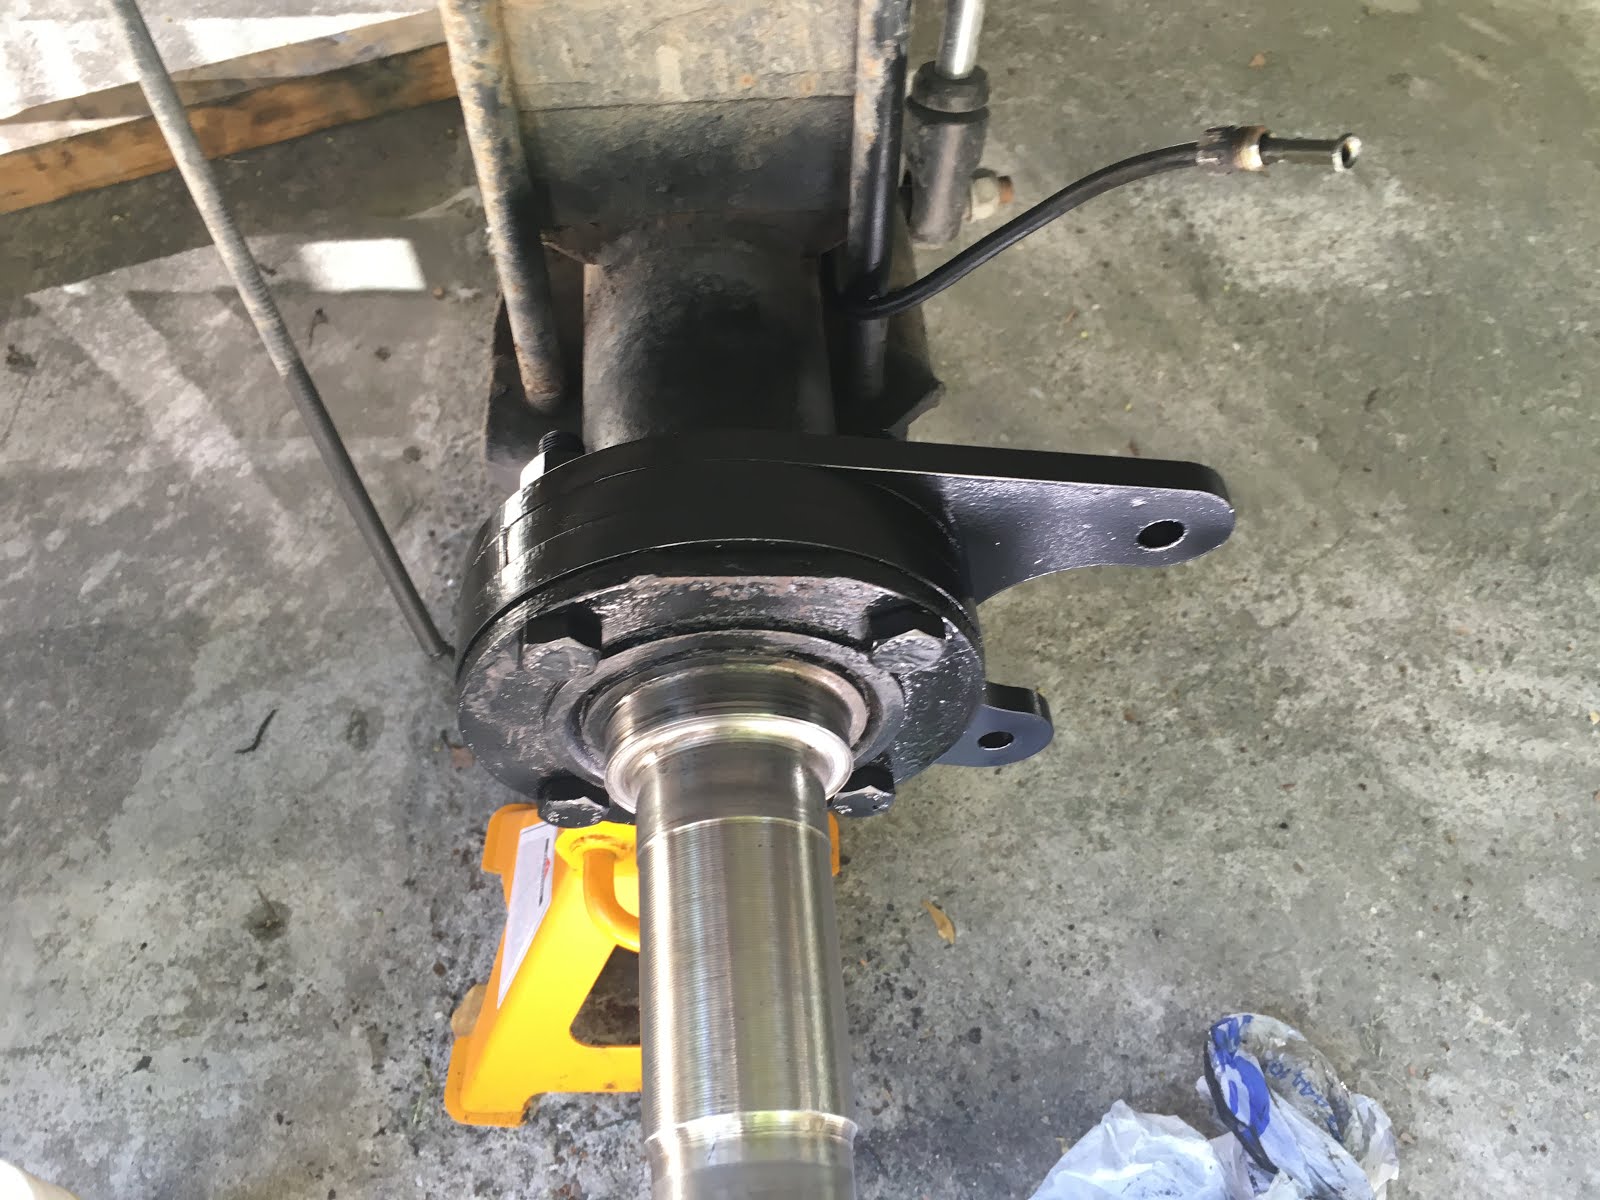

First hub+rotor assembly then caliper is mounted. Fist time true fitment! Hurray!

Don't get confused by the wheel spacer.


Everything is installed:

Please remember that rubber hose comes with the caliper, don't forget to buy the brake pads :) I also used standard Ford Transit V347 hand brake cables. There is only one thing, there are two different lengths for left and right. I purchased two rights because my handbrake system was modified and I needed two long cables. I yours is standard, which is split it to two from drivers side, you may need left (short) and right (long). Frankly, first I got the short ones but did not fit, so changed them with longer ones.

Now my brakes are perfectly stable, in rain, mud, and especially through the year. Drums' setup changes and they loose bite. I am very happy with the conversion. It was cheap and manageable.
Handbrake cable connection pictures will come soon.....
Nice conversion!
ReplyDeleteI want to do the samen but can't find the non vented rotors. Can you please share a link?